The art of homebrewing has captivated enthusiasts for generations, evolving from intricate, time-consuming processes to accessible, rewarding hobbies. While many homebrewers are familiar with crafting their own beers, the realm of homemade wine often remains unexplored. However, as demonstrated in the insightful video above, learning how to make a wine kit can be a surprisingly straightforward and immensely gratifying venture, requiring minimal additional equipment for those already familiar with beer brewing.
For those considering entry into the fascinating world of viticulture from the comfort of their home, understanding the simplicity and versatility of modern wine kits is paramount. These kits are meticulously designed to guide you through the winemaking process, ensuring a high-quality product with relative ease. A deeper dive into these kits reveals the potential for crafting a diverse range of exquisite wines.
The Simplicity and Versatility of Modern Wine Kits
Contemporary wine kits have revolutionized home winemaking, transforming a seemingly complex craft into an approachable and enjoyable activity. These kits are celebrated for their user-friendliness, making them ideal for both seasoned homebrewers and absolute novices alike. The beauty of these kits is found in their comprehensive nature, as everything required for fermentation is conveniently included in a single package.
Indeed, a wide array of wine types can be produced using these convenient kits. Imagine if you could create vibrant red wines, crisp white wines, delicate rosés, or even adventurous fruit wines right in your own kitchen. Such a diverse selection is readily available through various kit offerings, catering to almost any palate preference. Furthermore, these kits are available at different quality tiers; some are designed for rapid production, yielding a drinkable wine in just a few weeks, while others prioritize superior flavor and body, necessitating a more extended aging period of four to eight weeks, akin to premium commercial wines.
Each wine kit typically contains a significant amount of concentrated grape juice, often weighing around four kilograms for higher-quality options. This concentration is a key component, determining the final character and richness of the wine. Additionally, fining agents, such as bentonite, are provided to assist in clarification, ensuring a visually appealing product. The inclusion of specialized winemaking yeast, along with other essential additives like oak chips for certain varietals, rounds out the comprehensive contents of these kits, making the process of making a wine kit remarkably streamlined.
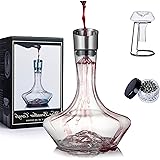
Essential Equipment for Making Your Own Wine
Embarking on the journey of home winemaking does not necessarily require a significant investment in new equipment, especially for individuals already engaged in beer brewing. Many tools utilized for beer kits, such as fermenters and sanitization supplies, are perfectly suitable for the initial stages of wine production. This dual utility presents an economical advantage for those looking to expand their brewing repertoire without incurring substantial additional costs.
However, for individuals new to brewing altogether, a dedicated wine making starter kit is an excellent investment. Such kits are thoughtfully assembled to provide all the fundamental equipment needed for successful winemaking. Typically, these comprehensive bundles include two fermenters, which facilitate primary fermentation and subsequent racking for clarification, along with a bottling stick for simplified filling of bottles. The provision of correct products is often prioritized to ensure the best possible outcome from your chosen wine kit.
Furthermore, certain specialized items can greatly enhance the winemaking process. A degasser, often referred to as a wine whip, is an invaluable tool utilized to remove dissolved carbon dioxide from the wine post-fermentation. This critical step prevents unwanted fizziness and improves the wine’s overall mouthfeel and clarity. Another useful inclusion in many kits, particularly for red wines, is a hop sock; despite its name, it is effectively used to contain oak chips, preventing them from contaminating the wine or clogging equipment during various stages of the process.
When it comes to bottling your finished product, a flexible approach is often taken. While wine bottles are not typically included in the starter kits, they can be conveniently purchased separately. Alternatively, recycled commercial wine bottles are perfectly suitable, provided they are thoroughly cleaned and sanitized. This sustainable practice not only reduces waste but also contributes to the cost-effectiveness of home winemaking.
The Step-by-Step Process: From Kit to Cask (or Bottle)
The journey of making a wine kit involves a sequence of precise steps, each contributing to the quality and character of the final product. Adherence to the provided instructions is crucial for optimal results, as subtle variations from beer brewing practices are present. This structured approach ensures that even complex processes are made manageable for the home winemaker.
Thorough Sanitation: A Non-Negotiable First Step
As with all homebrewing endeavors, immaculate sanitation is the cornerstone of successful winemaking. Every piece of equipment that will come into contact with the wine must be meticulously cleaned and sanitized to prevent contamination from undesirable microorganisms. Typically, a kit includes a two-part sanitization system: sodium percarbonate, a powerful cleaner that removes residues, followed by Kem San, a no-rinse sanitizer. This latter product creates a sterile environment without the need for additional rinsing, simplifying the preparation process considerably.
Preparing the Must: Bentonite and Grape Juice Concentrate
The initial stage of preparing the wine “must” (the unfermented grape juice) involves introducing specific fining agents. Two liters of hot water are typically added to the primary fermenter, followed by a sachet of bentonite. Bentonite, a form of clay, acts as a fining agent by attracting and binding smaller particles together, causing them to settle at the bottom of the fermenter. This early clarification step is instrumental in achieving a clear, brilliant wine. Consequently, the concentrated grape juice, a wobbly four-kilogram bladder, is then carefully transferred into the fermenter, often requiring assistance to extract all its rich contents.
Hydration and Flavor Infusion: Water and Oak Chips
Following the addition of the grape juice concentrate, the fermenter is topped up to a precise volume, commonly 23 liters, using good quality cold water. This dilution brings the must to its intended strength and volume. For certain wine styles, particularly reds, oak chips are introduced at this stage to impart desirable flavors and aromas. These chips are often placed within a hop sock, which allows for their easy removal once the desired oak character has been achieved, preventing them from creating sediment or blocking equipment. The oak chips gradually sink as they absorb the liquid, slowly releasing their complex notes into the wine.
Initiating Fermentation: Adding Yeast and Sealing the Fermenter
With the must prepared and the oak chips submerged, a gravity reading is taken to establish the initial sugar content, which will later be used to calculate the wine’s final alcohol by volume (ABV). Subsequently, the specialized wine yeast is simply sprinkled onto the surface of the must; stirring is generally not required, as the yeast will naturally begin its work. The fermenter is then sealed tightly with a lid, and an airlock, partially filled with no-rinse sanitizer, is securely placed. This airlock allows carbon dioxide produced during fermentation to escape while simultaneously preventing airborne contaminants from entering the vessel, thereby safeguarding the delicate winemaking process.
Post-Fermentation: Clarifying and Customizing Your Wine
Once the primary fermentation is complete, as indicated by a stable gravity reading according to the kit’s instructions, the wine enters a crucial phase of clarification and refinement. This stage ensures that the finished product is not only palatable but also visually appealing, free from haze or suspended particles. Additionally, this period offers opportunities for customization, allowing the home winemaker to tailor the wine to specific preferences.
The Critical Role of Degassing
After fermentation, wine contains a significant amount of dissolved carbon dioxide, which can negatively impact its clarity and flavor profile. Imagine if a sparkling wine were mistakenly intended to be still; the residual CO2 would detract from the desired character. Therefore, degassing is a critical step, which involves actively removing this dissolved gas. This process can be performed manually with a paddle, but it is often more efficiently accomplished using a specialized tool such as a wine whip or degasser. The gentle agitation from these tools encourages the carbon dioxide to escape, leading to a smoother, clearer wine.
Racking and Fining for Optimal Clarity
Following primary fermentation and degassing, the wine is typically transferred, or “racked,” into a second fermenter. This separation from the spent yeast (lees) and other sediments is a vital step in achieving crystal clarity. During this secondary stage, additional fining agents, often included in the kit, are introduced. These agents work by binding to microscopic particles that cause haze, encouraging them to settle at the bottom. This systematic approach ensures that the wine achieves its optimal brilliance, preparing it for bottling.
Bottling Your Homemade Creation
The culmination of the home winemaking process is bottling, where the refined wine is transferred into its final containers. Whether using newly purchased bottles or thoroughly cleaned and sanitized recycled screw-top wine bottles, a bottling stick greatly simplifies this task. This tool allows for precise filling, minimizing oxygen exposure and spillage, thereby preserving the wine’s quality. For instance, the ease of using recycled screw-top bottles, previously containing commercial wines, showcases the practical and sustainable aspects of making a wine kit.
Tailoring Your Wine: Adjusting ABV and Flavor Profile
One of the most appealing aspects of making a wine kit is the ability to customize the final product to personal taste. A prime example of this flexibility is adjusting the alcohol by volume (ABV). While many kits are designed to produce wine at approximately 13-14% ABV when fermented to 23 liters, this strength can be modified. For example, by increasing the final volume from 23 liters to 29 liters, the ABV can be reduced significantly, potentially bringing it down to around 9%. This adjustment yields a lighter, more easily drinkable wine, perfect for mid-week enjoyment without sacrificing body or aroma.
Uncorking Your Wine Kit Questions
What are modern wine kits?
Modern wine kits make home winemaking accessible and enjoyable for both beginners and experienced brewers. They are comprehensive packages that include everything needed for the fermentation process.
Do I need special equipment to make wine from a kit?
If you already brew beer, many of your existing tools like fermenters can be used. For those new to brewing, a dedicated wine making starter kit is an excellent investment, providing all the necessary fundamental equipment.
What is the very first step when starting a wine kit?
The absolute first and most important step is thorough sanitation. Every piece of equipment that will contact the wine must be meticulously cleaned and sanitized to prevent contamination.
Can I change the strength of the wine I make with a kit?
Yes, you can customize your wine, including adjusting its alcohol by volume (ABV). For example, increasing the final volume by adding more water can reduce the wine’s strength.