Embarking on Your Home Winemaking Journey: A Detailed Guide
Making wine at home is a rewarding endeavor, transforming fresh grapes into your very own vintage. The video above provides an excellent quick overview of the essential steps, and this supplementary guide will delve deeper into each stage, offering insights and expanded knowledge crucial for successful home winemaking.
Essential Equipment for Home Winemaking Success
Before any grapes are touched, assembling the necessary tools is paramount. While some basic items might be found around the house, specialized equipment significantly streamlines the process and ensures quality. Imagine if proper equipment was not acquired, the initial stages could become quite cumbersome. A primary fermentation vessel, often a food-grade bucket of at least 30 liters, is typically utilized for the initial fermentation phase. Furthermore, a secondary fermentation vessel, such as a 15-liter carboy or demijohn, becomes essential for later stages.
In addition, a hydrometer is needed for measuring sugar levels, and an airlock is required to allow carbon dioxide to escape without oxygen entering. Sanitizing agents, like sodium metabisulfite, are indispensable for maintaining a clean environment, as sterility is a cornerstone of quality winemaking. Clean snips for harvesting, a grape crusher/destemmer, a press, and various measuring tools complete the basic kit.
Step 1: The Art of Harvesting and Sorting Grapes
The initial phase of making wine at home begins with the careful harvest of ripe grapes. As demonstrated in the video, clean snips are used to remove bunches from the vine. It is crucial that only healthy, fully ripe grapes are selected, as under-ripe or over-ripe fruit can negatively impact the final wine’s flavor and balance. Imagine if damaged or moldy grapes were included; the entire batch could be compromised.
During the sorting process, any leaves, stems, or damaged berries are meticulously removed. This step significantly reduces the risk of off-flavors being introduced into the wine. Moreover, this careful attention to detail ensures that only the best fruit contributes to the ‘must’ – the freshly crushed grape juice, skins, and seeds.
Step 2: Destemming, Washing, and Crushing the Grapes
Following the harvest, the grapes are prepared for fermentation. Destemming, the removal of grape stems, is often performed to prevent an excess of astringent tannins and green flavors from being imparted to the wine. While some winemakers might choose to leave a small percentage of stems for added structure, especially in red wines, this decision is typically made with specific stylistic goals in mind. Dave’s approach, leaving some stems, is an experimental method that can influence the tannin profile.
A light wash is typically given to the grapes, as shown, primarily to remove surface debris without stripping away beneficial natural yeasts or diluting the sugars. Subsequent to washing, the grapes are crushed. Traditionally, this was done by foot, but mechanical crushers are now commonly employed. The goal is to break the skins to release the juice, creating the ‘must’ without crushing the seeds, which can release undesirable bitter compounds. The video highlights the importance of leaving the skins in, as they are a rich source of tannins and color, vital for the character of red wine.
A critical consideration during this and all subsequent steps is sanitation. All equipment that comes into contact with the grapes or must must be thoroughly cleaned and sterilized. This practice prevents the growth of unwanted bacteria and wild yeasts that could spoil the wine. As Dave emphasizes, “it’s all about keeping things clean.”
Step 3: The Cold Soak Process (Maceration)
After crushing, a process known as ‘cold soak’ or ‘cold maceration’ may be performed. This involves holding the must at a low temperature, specifically between 10 and 15 degrees Celsius, for a period of 3 to 5 days, as mentioned by Dave. This controlled cooling extracts desirable color and aromatic compounds from the grape skins before fermentation begins. Imagine if this step was skipped; the resulting red wine might exhibit less vibrant color and a diminished aromatic complexity.
During the cold soak, the must is typically punched down twice daily. This action submerges the ‘cap’ – the layer of skins and solids that rises to the surface – ensuring maximum contact between the juice and the skins. This continuous contact facilitates the extraction of beneficial elements. Moreover, consistent temperature monitoring is essential to ensure the must remains within the desired range, preventing premature fermentation.
Step 4: Primary Fermentation – The Heart of Winemaking
Primary fermentation is where the magic truly happens: yeast consumes the grape sugars and converts them into alcohol and carbon dioxide. This critical stage, optimally maintained between 22 and 28 degrees Celsius, typically lasts for 7 to 10 days. Dave demonstrates practical methods for temperature control, using blankets and heat mats to achieve the necessary warmth in an outdoor setting. Maintaining a stable temperature is vital, as fluctuations can stress the yeast, potentially leading to a ‘stuck’ fermentation or the production of off-flavors.
Winemaking yeast, often added after the cold soak, is specifically chosen for its ability to efficiently ferment grape sugars while contributing desirable flavor profiles. As fermentation progresses, vigorous bubbling will be observed, a clear indicator that the yeast is actively working. During this period, the cap is regularly punched down, usually twice a day, to prevent spoilage and aid in the extraction of color and tannins from the skins. This ensures the skins remain moist and integrated with the fermenting juice. Regular monitoring with a hydrometer is used to track the diminishing sugar levels, signaling the approaching end of primary fermentation. The bubbles diminishing on the tenth day, as Dave observes, indicates that most of the sugar has been converted.
Step 5: Pressing and Transfer to a Demijohn
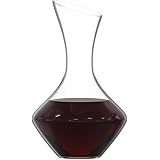
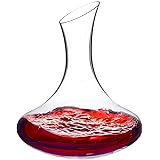
Once primary fermentation has ceased, the next critical step involves separating the newly fermented wine from the grape solids. This process, known as pressing, is meticulously performed to extract the remaining liquid. Dave uses a strainer and muslin cloth, carefully squeezing out the juice from the ‘pomace’ – the mixture of skins, seeds, and stems left after fermentation. It is important to remember that all equipment, including the fermenting barrel and the 15-liter demijohn (also known as a carboy), must be immaculately clean and sterilized before use. Imagine if contaminants were introduced at this stage, the risk of spoilage would be significant.
The extracted juice, now young wine, is then transferred from the primary fermenting barrel into the clean demijohn. This vessel, often a 15-liter carboy as used by Dave, serves as the resting place for the subsequent stages of winemaking. The demijohn is then sealed with an airlock, which allows any residual carbon dioxide to escape while preventing oxygen from entering. Oxygen exposure at this stage can lead to oxidation, spoiling the wine’s fresh flavors and aromas. This careful transfer is often referred to as ‘racking,’ where the wine is carefully moved off the lees (spent yeast cells and grape sediment) that have settled at the bottom of the primary fermenter, preventing undesirable flavors.
Looking Ahead: Malolactic Fermentation
As the wine rests in the demijohn, the next phase, malolactic fermentation (MLF), is anticipated. This secondary fermentation, lasting typically 1 to 3 months, involves lactic acid bacteria converting sharp malic acid (found in apples) into softer lactic acid (found in milk). This process is particularly common in red wines, contributing to a smoother mouthfeel and often adding complex notes of butter or hazelnut. Imagine if this transformation did not occur; the wine might retain a more tart and edgy character.
Not all wines undergo MLF; it is often selectively performed depending on the desired style. For white wines, especially crisp varietals, MLF might be intentionally prevented to preserve their vibrant acidity. Monitoring MLF involves laboratory analysis or specialized kits to track the reduction of malic acid. Upon completion, a small addition of sulfur dioxide (SO2) is frequently made to stabilize the wine and protect it from oxidation and microbial spoilage, preparing it for the final stages of aging and eventual bottling.
Uncorking Your Wine-Making Questions
What is home winemaking?
Home winemaking is a rewarding process of transforming fresh grapes into your own wine. It involves several key steps, from harvesting and crushing grapes to fermentation and aging.
What essential equipment do I need to start making wine at home?
You’ll need a primary fermentation vessel (like a food-grade bucket), a secondary vessel (carboy or demijohn), a hydrometer to measure sugar, an airlock, and sanitizing agents. A grape crusher/destemmer and a press are also very useful.
What are the first steps with the grapes after harvesting?
After carefully harvesting and sorting healthy, ripe grapes, you destem them to remove unwanted stems. Then, the grapes are gently crushed to release their juice, creating a mixture called ‘must’.
What is ‘primary fermentation’?
Primary fermentation is the crucial stage where yeast consumes the grape sugars and converts them into alcohol and carbon dioxide. This process typically lasts 7 to 10 days and is where the wine really begins to form.
Why is cleanliness so important when making wine?
Sanitation is paramount because it prevents the growth of unwanted bacteria and wild yeasts that could spoil your wine. Keeping all equipment sterile ensures the quality, safety, and desired flavors of your homemade wine.