Imagine the profound satisfaction of uncorking a bottle, knowing every drop was meticulously crafted by your own hands. This pursuit of personal vintage perfection often begins with a well-chosen **winemaking starter kit**. While the accompanying video offers a concise, visual walkthrough, a deeper insight into each critical step elevates the craft. This guide is designed to augment that visual instruction, providing expert context and expanding on the nuances of **home winemaking**.
The Essential Toolkit for Home Winemaking Mastery
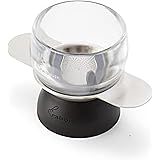
The journey commences with understanding your equipment. A comprehensive **winemaking starter kit** includes specialized vessels and instruments. For instance, the primary fermenter is where initial vigorous fermentation occurs. Conversely, the secondary fermenter is utilized for clarifying and stabilizing the young wine. Each component serves a distinct purpose. This ranges from the airlock, which permits gas escape while preventing oxidation, to the hydrometer, crucial for specific gravity measurements. This instrument quantifies sugar density. It thereby indicates fermentation progress.
Key Components within Your Kit:
- Primary Fermenter: A larger vessel. The initial active fermentation phase transpires within it.
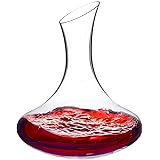
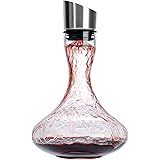
- Secondary Fermenter: Often a smaller glass or PET carboy. It is used for clarification and bulk aging. This minimizes surface area exposure.
- Airlock: This is essential for maintaining an anaerobic environment. It also allows CO2 release.
- Hydrometer & Trial Jar: Used to measure the Specific Gravity (S.G.). This is a critical metric for tracking fermentation. It also aids in calculating potential alcohol content (ABV).
- Syphon: A sterile tool. It is used for transferring wine gently. This leaves sediment undisturbed.
- Cleaner & Steriliser: Absolutely non-negotiable. It ensures no unwanted microorganisms contaminate the must.
Initial Preparation: The Foundation of Quality Wine
The first principle in quality **home winemaking** is meticulous hygiene. Contamination is a primary risk factor. Cleaning and sterilising all equipment before use prevents spoilage. This includes wild yeasts or bacteria. A sanitiser solution effectively eliminates these threats. All surfaces touching the must must be impeccably sterile. This includes the primary fermenter, lid, airlock, syphon, and mixing spoon. This process, typically requiring a 10-minute contact time, is paramount. Imagine if a small colony of Acetobacter were introduced; your nascent wine could quickly turn to vinegar.
Following sterilisation, the must preparation begins. Brewing sugar, a fermentable sugar source, is dissolved in 1 L of boiling water. The quantity of sugar varies. 670 g is specified for whites/rosés. However, 890 g is utilized for reds. This differentiation caters to typical target alcohol levels. It also aligns with the body of each wine style. The grape juice concentrate blend is then incorporated. The fermenter is subsequently topped up to 4.6 L with cold tap water. Proper mixing ensures uniform sugar distribution. A thermometer strip is affixed. Then the specific gravity (S.G.) is measured. Yeast addition requires the must temperature to be 26°C or below. Yeast nutrient is added to support healthy fermentation. An acidity regulator also balances pH. This is crucial for microbial stability and flavor. A properly sealed lid with an airlock, filled with boiled and cooled water, completes this stage.
Fermentation Dynamics: Yeast’s Crucial Role
The primary fermentation stage is where the magic of **winemaking** truly unfolds. Yeast, a single-celled fungus, consumes sugars. It produces alcohol and carbon dioxide. This process is generally active for approximately 5 days. Optimal fermentation temperatures are critical. They typically range between 20-25°C. Lower temperatures can lead to sluggish or “stuck” fermentation. Excessively high temperatures can produce off-flavors and stress the yeast. Regular specific gravity readings are indispensable during this phase. After 5 days, a sample is drawn. The S.G. is measured. For instance, an S.G. reading might indicate an ABV of 10.5%. This signifies significant sugar conversion.
This active fermentation period is marked by vigorous bubbling through the airlock. This visible activity is reassuring. However, the hydrometer provides quantitative data. A static S.G. reading over several days confirms sugar conversion. This is especially true when it approaches 0.995 to 1.000. Neglecting temperature control or proper nutrient levels could result in yeast stress. This leads to a host of undesirable outcomes. These include incomplete fermentation or the production of volatile compounds.
Clarification and Stabilization: Achieving Pristine Wine
Once primary fermentation subsides, the wine enters its clearing phase. First, the secondary fermenter, syphon, and mixing spoon are meticulously cleaned and sterilised. The young wine is then carefully transferred, or “racked,” from the primary to the secondary fermenter. This leaves behind the heavy yeast sediment, or “lees.” This step is crucial. Prolonged contact with lees can impart undesirable off-flavors.
Post-racking, a stabiliser is added. This compound, often potassium metabisulfite and potassium sorbate, prevents further fermentation and microbial spoilage. The wine is then stirred vigorously for 10 minutes. This action is not merely mixing. It is a critical degassing process. Dissolved carbon dioxide, a byproduct of fermentation, must be removed. This prevents refermentation in the bottle. It also improves wine clarity and mouthfeel. Imagine if this gas were left in; bottles could potentially burst or the wine would be unpleasantly effervescent.
Following degassing, Finings A (often kieselsol) and flavouring are added. They are thoroughly stirred. Finings are agents that attract and bind to suspended particles. This causes them to precipitate out of the wine. After approximately 1 hour, Finings B (often chitosan) is added. It is stirred for 10 seconds. This two-part fining system typically works synergistically. It rapidly clears the wine. The lid with an airlock is replaced. Within 2 days, the turbidity of the wine significantly diminishes. A small sample drawn from halfway down the fermenter allows for clarity assessment. A brilliant, clear wine is the objective.
Final Transfer and Storage: Safeguarding Your Creation
The final transfer, often termed bottling or packaging, is a delicate operation. The clear wine is siphoned into the stand-up wine pouch. This ensures minimal disturbance to any residual sediment. The syphon tube is carefully placed into the pouch opening. As the pouch fills, the opening is gently lifted. This prevents oxidation. Tilting the fermenter aids in extracting the last of the wine. However, extreme caution must be exercised. This avoids transferring sediment. The pouch tap is then securely pushed into the opening. It requires two distinct clicks for a reliable seal.
Proper storage conditions are vital. They preserve the wine’s character. White or rosé wines are best stored in the fridge. Red wines, conversely, benefit from storage at 15-20°C. This temperature range helps prevent premature aging. It also preserves the wine’s delicate aromas and flavors. The diligent execution of these steps, from initial sterilisation to final storage, culminates in a rewarding **home winemaking** experience. The wine, once settled and properly aged, is then ready for enjoyment from your **winemaking starter kit**.
Fermenting Your Winemaking Questions
What is a winemaking starter kit?
A winemaking starter kit provides all the essential equipment and ingredients needed to make wine at home. It’s designed to guide beginners through the process of creating their own wine.
Why is it important to clean and sterilize equipment when making wine?
Cleaning and sterilizing all equipment is crucial to prevent unwanted microorganisms like wild yeasts or bacteria from contaminating your wine. This step ensures your wine ferments properly and doesn’t spoil.
What is the primary role of yeast in winemaking?
Yeast is a single-celled fungus that consumes the sugars in your grape juice (must) during fermentation. This process converts the sugar into alcohol and carbon dioxide, which is how wine is made.
What happens to the wine after the main fermentation is complete?
After primary fermentation, the wine is transferred to a secondary fermenter to clear, a process called racking. Stabilizers and fining agents are then added to prevent further fermentation, remove dissolved gases, and clarify the wine.
How should homemade wine be stored?
Proper storage depends on the type of wine: white and rosé wines should be stored in the fridge, while red wines are best kept at temperatures between 15-20°C. This helps preserve their flavor and prevents premature aging.