For millennia, the art of crafting wine has been an integral part of human civilization, evolving from accidental fermentation to a refined practice. The transformation of humble grapes into a sophisticated beverage is a natural wonder that has captivated many throughout history. In fact, if one were merely to place grapes into a container and allow them to rest, wild yeasts would invariably initiate the fermentation process, thus creating a crude form of wine. However, the pursuit of truly exceptional wine, capable of rivaling renowned vintages, is entirely achievable for the home enthusiast today. As demonstrated in the accompanying video featuring Tim Vandergrift from Master Vintner, embarking upon the rewarding journey of home wine making is simpler and more accessible than ever before, promising delicious results from the very first batch.
The prospect of producing your own wine might initially seem daunting, yet modern kits and clear guidance empower aspiring vintners to succeed. This comprehensive guide serves to elaborate on the principles and procedures outlined in the video, providing a deeper understanding of each crucial step. Consequently, individuals are equipped not only to follow instructions but also to comprehend the underlying scientific processes involved. This detailed approach ensures that your first foray into making wine at home yields a product of remarkable quality, allowing for a personalized expression of taste and dedication.
The Enduring Appeal of Home Wine Making
The desire to create one’s own wine extends far beyond mere cost savings; it represents an engaging hobby and a profound connection to an ancient tradition. When people consider home wine making, they are joining a community that values craftsmanship and personal satisfaction. Imagine savoring a glass of wine, knowing that every aspect of its creation was carefully managed by your own hands. This level of personal involvement offers immense satisfaction, distinguishing homemade wine from store-bought alternatives.
Furthermore, the ability to customize your wine offers unparalleled opportunities for experimentation and learning. While commercial wineries adhere to specific profiles, the home winemaker possesses the freedom to explore various styles, sweetness levels, and oak influences. This personalized approach often leads to the discovery of unique preferences that perfectly complement individual tastes and occasions. Therefore, the appeal of crafting your own wine is deeply rooted in both the tangible product and the enriching experience of its creation.
Essential Equipment for Your Winemaking Journey
Embarking on a home wine making venture requires a selection of specialized equipment, each item performing a vital function within the process. As was succinctly presented in the video, assembling the correct tools is a foundational step towards successful fermentation and bottling. Understanding the purpose of each piece ensures that it is utilized effectively, thereby maintaining the integrity of your wine from start to finish. Proper equipment care and preparation are paramount for hygiene and consistent results.
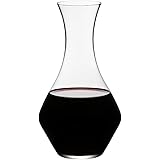
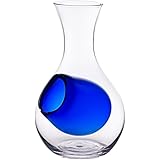
The primary fermentation vessel, often a large six and a half gallon plastic fermenter, accommodates the initial vigorous bubbling of the grape must. Subsequently, a six-gallon glass carboy is utilized for secondary fermentation and aging, allowing the wine to clarify peacefully. Essential accessories include a bung and an airlock, which are critical for preventing air ingress and oxidation while permitting carbon dioxide to escape. Cleaning supplies, such as cloths and specialized sanitizing agents like One Step no-rinse sanitizer and metabisulfite solution, are indispensable for maintaining a sterile environment. Additional tools encompass a plastic spoon for stirring, a bottle filler for precise pouring, five feet of tubing, and an auto siphon for safe liquid transfers. A Clean Bottle Express wine and beer degasser is also employed to remove dissolved carbon dioxide, a step crucial for clarity and taste. Brushes specifically designed for carboys and bottles facilitate thorough cleaning, while corks and a corking machine finalize the bottling process. Finally, a thermometer and stick-on thermometers help regulate fermentation temperatures, and a wine thief alongside a hydrometer with its test jar are used for sampling and tracking fermentation progress. Each tool plays a distinct role in ensuring the successful production of high-quality homemade wine.
The Cornerstone of Success: Understanding Your Instructions
Although the temptation to jump straight into the practical steps of making wine at home can be strong, the single most critical action is to thoroughly read your kit’s instructions. These detailed documents are meticulously crafted, serving as the definitive guide for your specific wine kit. Within these pages, essential information regarding temperature ranges, fermentation timelines, and specific gravity readings is provided. Disregarding these instructions can lead to unforeseen issues, potentially compromising the quality and success of your batch.
Wine kits are scientifically formulated in professional wineries, ensuring that each component—such as nutrient levels, sugar content, tannin, and acid—is perfectly balanced. Consequently, successful outcomes are largely dependent upon adhering to these precise specifications. It is important to remember that instructional guidelines, particularly regarding kit-specific additions like oak or sweetening packets, may occasionally vary from general video demonstrations. In instances where there is a discrepancy between the video content and your kit’s written instructions, the latter must always take precedence, ensuring optimal results for your unique wine. Thus, patience and careful study of the instructions are rewarded with a superior finished product.
The Foundation: Cleaning and Sanitizing Procedures
Achieving outstanding results in home wine making fundamentally depends on rigorous cleaning and sanitizing of all equipment. These two distinct processes are often confused, yet each serves a unique and vital purpose. Cleaning involves the physical removal of visible dirt, residue, and stains from surfaces, which is typically accomplished with warm water and a suitable cleaning agent. This preparatory step ensures that equipment is free from organic matter that could harbor unwanted microorganisms.
Conversely, sanitizing focuses on inhibiting the growth of spoilage organisms and bacteria that are invisible to the naked eye. After cleaning, equipment is treated with a sanitizer, creating an environment inhospitable to these detrimental microbes. It is imperative that household cleaning products, which frequently contain industrial perfumes, are avoided; these fragrances can permeate plastic and leave residues on glass, thereby contaminating the wine. Instead, specialized products like One Step cleaner are recommended, utilized at a concentration of approximately one tablespoon per gallon of warm water for effective cleaning. Subsequently, a metabisulfite solution, prepared with three tablespoons of sulfite powder per gallon of cool water, is commonly employed for sanitization. Equipment can be dipped, soaked, or sprayed with this solution, then allowed to drip dry or rinsed with clean water. Care must be taken not to inhale the vapors from the sulfite solution, which possess an unpleasant odor. Furthermore, any leftover sulfite solution can be stored in a tightly sealed jar at room temperature for up to a month, allowing for continued use and reducing waste.
Unpacking Your Wine Kit: Key Ingredients Explained
Once all equipment has been meticulously cleaned and sanitized, attention turns to the contents of your wine kit, which contains all necessary ingredients for your home wine making project. These components are carefully selected to ensure a balanced and successful fermentation. Each element plays a specific role in developing the wine’s character and ensuring its stability.
A crucial first step involves identifying the product code sticker on the box and attaching it to your instructions; this code provides vital information for any future inquiries. The kit invariably includes a specially chosen packet of yeast, responsible for converting sugars into alcohol and carbon dioxide. Bentonite, a finely powdered clay, is typically added on day one to aid in clarification and to support the initiation of fermentation. Later in the process, potassium sorbate and potassium metabisulfite are introduced as stabilizers, protecting the wine from oxidation and further fermentation in the bottle. Fining agents are also included to ensure the wine clarifies properly and within the expected timeline. Additionally, some kits may contain oak powder, which is designed to simulate the aging effects of barrel contact, imparting desirable vanilla, toasty, or woody notes to the wine. Other kits might feature sweetening packets for post-fermentation adjustment, emphasizing the importance of consulting your specific instructions for precise usage. Understanding these ingredients allows for a more informed and controlled winemaking experience.
Initiating Fermentation: The First Steps to Delicious Wine
The initial phase of making wine at home involves carefully preparing the grape must for fermentation, a series of steps that lay the groundwork for a successful vintage. This stage demands precision, especially concerning temperature and ingredient incorporation, to ensure the yeast can perform optimally. Adhering to the specified guidelines during these initial hours greatly influences the final quality of the wine.
First, bentonite is dissolved in approximately half a gallon of warm water at the bottom of the primary fermenter. To prevent clumping, it is advisable to stir the water vigorously before slowly incorporating the powdered clay. Subsequently, the large bag of grape juice concentrate is carefully poured into the fermenter, followed by topping up the vessel with lukewarm water to the designated six-gallon mark. It is critically important that the water temperature falls between 72 and 75 degrees Fahrenheit before yeast addition; temperatures outside this range can hinder or stress the yeast, potentially leading to off-flavors or stalled fermentation. After the correct volume and temperature are achieved, the must requires a thorough stirring to ensure all sugars are evenly distributed, as they tend to settle at the bottom. A hydrometer reading is then taken using a wine thief and test jar, which measures the specific gravity (density) of the liquid. This initial reading, such as 1.090, indicates the sugar content and potential alcohol yield, which, in this example, suggests a final alcohol content of over 12.5 percent. This figure should be carefully recorded in the instructions. After this, any included oak powder is added and stirred beneath the surface, imparting desirable flavor compounds as it saturates. Finally, the yeast packet is simply sprinkled directly onto the surface of the must without rehydration; upon contact, the yeast begins its essential work, transforming sugars into alcohol. The primary fermenter is then sealed with its lid, bung, and an airlock filled halfway with water, which allows carbon dioxide to escape while preventing oxygen ingress. The fermenter is then placed in an undisturbed area, allowing the primary fermentation to proceed for five to seven days.
Monitoring Progress: Secondary Fermentation and Racking
Following the initial primary fermentation, the wine progresses to secondary fermentation, a phase crucial for clarification and continued development. This transition is known as racking, a process where the wine is carefully transferred from one vessel to another, leaving behind sediment. Proper timing for this step in home wine making is determined by monitoring the specific gravity.
After five to seven days of primary fermentation, a specific gravity reading is taken from the wine using a sanitized wine thief and hydrometer. It is imperative that this reading is 1.010 or less before proceeding with racking. Premature transfer can result in excessive foaming in the carboy, potentially leading to spillage and a messy cleanup. If the gravity reading exceeds 1.010, an additional couple of days are allowed for fermentation, followed by another check. Once the specific gravity is confirmed to be at or below 1.010, the wine is ready for transfer. An auto siphon, previously sanitized, is utilized for this purpose, with its sediment-blocking tip placed at the bottom of the primary fermenter. The hose is then directed into the sanitized six-gallon glass carboy, and a smooth pumping action initiates the flow. During this transfer, care is taken to leave behind any visible sediment, primarily spent yeast cells and oak particles, ensuring that the carboy receives as much clear liquid as possible. The carboy is then sealed with a fresh bung and airlock, allowing the wine to continue its slower secondary fermentation and begin clarifying over the next ten days.
Refining Your Wine: Stabilization and Clarification
After the secondary fermentation period, the wine requires stabilization and clarification to achieve its optimal state before bottling. This stage is critical in home wine making for ensuring the wine is clear, stable, and free from off-flavors caused by dissolved gases. Approximately ten days after racking into the carboy, a final specific gravity reading is taken to confirm fermentation is complete, indicated by a reading of 0.992 or less; this value should be diligently recorded.
Initially, sulfite and sorbate stabilizers are introduced to the wine. These agents are dissolved in about half a cup of water before being added to the carboy to prevent clumping and ensure even distribution. Their primary function is to prevent oxidation and inhibit any renewed fermentation within the bottle, which could lead to spoilage or undesirable fizziness. Subsequently, the wine must be thoroughly degassed, a process vital for removing dissolved carbon dioxide, a byproduct of fermentation. Without sufficient degassing, fining agents cannot work effectively, and the bottled wine may exhibit a metallic taste or unwanted fizz. A Clean Bottle Express wine degasser, attached to an electric drill, significantly simplifies this task. The degasser is inserted into the wine, and the drill is operated at full speed, first in one direction until the wine begins to climb the vessel, then reversed to prevent overflow. This back-and-forth motion, performed four or five times, effectively removes most of the dissolved CO2 in just a few minutes. After degassing, the fining agent, such as Kitosan, is added directly to the carboy and thoroughly stirred. These agents work by binding to suspended particles, causing them to settle out as sediment. The carboy is then resealed with a bung and airlock and returned to the fermenting area for an additional 14 days, maintaining a temperature of 72 to 75 degrees Fahrenheit, allowing the fining agents to complete the clarification process.
The Grand Finale: Bottling Your Homemade Vintage
The final and most anticipated step in home wine making is the bottling of your carefully crafted vintage. After 14 days of stabilization and clarification, the wine should appear beautifully clear, signaling its readiness for packaging. This stage requires meticulous attention to detail to ensure the wine’s integrity is preserved for future enjoyment.
Prior to bottling, a crucial step involves racking the wine once more from the carboy back into the primary fermenter, taking extreme caution not to disturb the layer of sediment (yeast cells and fining agents) at the bottom. This ensures that only clear wine is transferred for bottling. Should the wine still appear cloudy at this point, it is imperative not to proceed with bottling; instead, the wine should be left for a few more days to allow further clarification. Once clarity is confirmed, a sanitized auto siphon is connected to a bottle filler, an acrylic rod with a needle valve at its tip, designed for precise filling. By pressing the filler against the bottom of each sanitized bottle, the valve opens, allowing wine to flow. The bottle is filled neatly, stopping just as the wine reaches the neck. As the filler is withdrawn, the perfect amount of headspace is left for the cork. A minor amount of dripping is normal, so bottles are often placed on a protective surface. After filling, corks, which have been briefly soaked in a sulfite solution to soften them, are inserted using an impact corker. This device compresses the cork through a sleeve and pushes it firmly into the bottle neck. For effective corking, positioning oneself on the floor to leverage body weight over the corker proves beneficial. Within approximately four weeks and with minimal labor, a substantial quantity of finished wine, often two and a half cases, is produced. Post-bottling, the bottles must remain upright for three days, allowing internal pressure to equalize and corks to seat firmly. Subsequently, they can be laid on their side for long-term storage, ensuring the cork remains moist and the seal is tight, thereby protecting the wine from oxygen. Optional finishing touches, such as custom labels and capsules, can enhance the presentation of your exquisite home wine making creation, adding a professional flourish to your personal vintage.