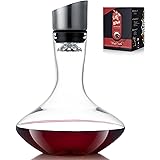
The journey into creating your own mead and wine is exciting. Many aspiring brewers wonder where to begin. Fortunately, getting started is simpler than you might imagine. This guide complements the video above. It dives deeper into the essential items you need. You can begin your very own home brewing adventure.
Home brewing offers immense satisfaction. It lets you craft unique beverages. However, proper preparation is key. We will explore each crucial piece of equipment. You can ensure a successful first batch.
Choosing Your Fermentation Vessel
Your brew needs a home. This home is called a fermenter. It holds your ingredients during fermentation. The video highlighted several excellent options.
Glass Fermenters: Visibility and Control
Glass carboys are popular choices. They offer clear visibility. You can watch your fermentation in action. Witnessing the bubbling is truly fascinating.
Glass is non-porous. This means it resists scratches. It is easy to clean thoroughly. Imagine if a plastic fermenter had tiny scratches. Harmful bacteria could hide there. Glass offers a cleaner surface.
However, glass is heavy and fragile. Handle it with great care. One-gallon jugs are perfect for beginners. Larger three or five-gallon vessels work for bigger batches. They suit advanced mead making.
Plastic Fermenters: Lightweight and Durable
Many brewers prefer plastic buckets. They are lightweight and virtually unbreakable. Food-grade plastic fermenters are very common. They are often inexpensive to purchase.
On the other hand, plastic can scratch. These scratches might harbor microbes. Proper cleaning is absolutely vital. Always choose food-grade plastic. Avoid anything not designed for brewing.
A frugal option exists. You can use one-gallon juice jugs. These are often made of glass. Simply drink the juice first. Then, clean the jug thoroughly. You get a free fermenter. This makes mead and wine making more accessible.
The Mighty Airlock: Your Brew’s Guardian
An airlock is a small but critical device. It fits into your fermenter’s lid or stopper. Its job is surprisingly simple. Yet, it performs a vital function.
Airlocks create a one-way valve. Fermentation produces carbon dioxide (CO2). This gas needs to escape. Otherwise, pressure builds dangerously. An exploding fermenter is a serious hazard. It can cause a huge mess.
Conversely, oxygen must stay out. Oxygen spoils your brew. It allows unwanted microbes to enter. Imagine if air could freely enter your fermenter. Your precious mead or wine would turn into vinegar. Airlocks let CO2 out while keeping oxygen away.
There are different types. The S-shaped and 3-piece airlocks are common. Both work very effectively. Fill your airlock with sanitizer solution. This creates the necessary liquid barrier. It ensures safety and sanitization.
Sanitization: The Unsung Hero of Home Brewing
Sanitization is not just important. It is absolutely paramount. Brian noted how ancient brewers likely drank infected brews. You do not want that experience. Sanitization protects your investment of time and ingredients.
An infected batch tastes terrible. It can even be unhealthy. Undesirable microbes like wild yeast or bacteria can thrive. They produce off-flavors and odors. These can range from sourness to buttery notes. It ruins your brewing efforts.
Star San: The Brewer’s Best Friend
Many brewers swear by Star San. It is an acid-based sanitizer. It works incredibly fast. You just mix it with water. Then, soak your equipment briefly. It’s a “no-rinse” sanitizer. This means you do not need to rinse it off. It leaves no harmful residue. This prevents re-contamination from tap water.
Always follow the label instructions. Use the correct dilution ratio. A red bucket, like Derica’s “Turrbos,” is perfect. Submerge all your tools completely. Ensure every surface touches the solution.
Alternatives to Star San
What if Star San is unavailable? Boiling small items can work. This sterilizes equipment effectively. However, it’s not practical for large vessels. High heat can also damage some plastics.
Baby bottle sanitizers are great. They are widely available. These products are food-safe. They are designed to kill germs. They protect delicate baby bottles. This makes them perfect for brewing equipment.
Avoid using household bleach. Bleach is extremely difficult to rinse. Any residue will kill your yeast. It can also impart chemical flavors. The risk of contamination is too high. Choose dedicated sanitizers for brewing. They ensure a clean and safe process.
Siphoning and Bottling: Gentle Transfers
Eventually, your brew will finish fermenting. You then need to transfer it. This process is called racking. It moves your liquid. You transfer it from the fermenter to bottles. Or maybe to another vessel. Siphoning is the best method.
The Auto-Siphon: A Brewer’s Essential
An auto-siphon makes racking simple. It uses a pump mechanism. This starts the liquid flow. You avoid excessive splashing. Splashing introduces oxygen. Oxygen is detrimental to finished mead or wine. It can cause oxidation. This results in stale, cardboard-like flavors.
An auto-siphon prevents disturbing sediment. You leave yeast and other solids behind. This creates a clearer final product. While not strictly essential, it is highly recommended. It significantly improves your brewing experience.
Bottling Your Masterpiece
You need bottles for storage. Repurposed wine or liquor bottles work well. Always clean and sanitize them thoroughly. Ensure they are designed for beverages. This is particularly crucial for carbonated drinks. Beer bottles or swing-top bottles are built for pressure. Regular wine bottles cannot handle carbonation. Imagine a bottle exploding due to pressure. That would be a wasted effort and a dangerous mess.
Measuring and Monitoring: The Mad Scientist’s Tools
Home brewing benefits from precision. Measuring tools offer valuable insights. They help you track your brew’s progress. These tools are worth the small investment.
The Measured Pitcher: For Accuracy
A good measuring pitcher is invaluable. Look for clear volume markings. Both US and metric units are ideal. This helps with ingredient additions. It also aids in knowing batch size. You can quickly assess how much liquid you have. This prevents overfilling or underfilling vessels.
Hydrometer and Graduated Cylinder: Unlocking Secrets
These two tools work together. A hydrometer measures specific gravity. This indicates sugar content. A graduated cylinder holds your liquid sample. You float the hydrometer in it. Taking readings at the start (Original Gravity) and end (Final Gravity) is vital. This reveals your brew’s alcohol content (ABV). More importantly, it tells you if fermentation is complete. A stable final gravity means fermentation has stopped. It confirms your brew is safe to bottle. Imagine if you bottled prematurely. Pressure could build. Your bottles might explode. The hydrometer prevents this guesswork.
The Versatile Funnel: A Simple Aid
A funnel seems basic. Yet, it serves many purposes. It helps transfer liquids cleanly. This minimizes spills and messes. Choose a large-surface-area funnel. This handles bigger volumes easily.
Stainless steel funnels are excellent. They are non-corrosive. They will not react with alcoholic liquids. Plastic funnels are fine too. Ensure they are food-safe. Never use a garage funnel for brewing. Chemicals could contaminate your brew. Always sanitize your funnel with everything else. This maintains cleanliness.
Starting your home brewing journey is exciting. You only need a few key items. These tools ensure success. Enjoy crafting your own mead and wine.


