Uncorking Flavor: Your Guide to Crafting Delicious Whole Fruit Blueberry Wine
Many aspiring winemakers dream of creating rich, complex wines right in their own homes, yet the thought of tackling a full fruit fermentation can feel daunting. Concerns about spoilage, unclear instructions, or simply getting the process right often deter enthusiasts from exploring the full potential of homemade fruit wines. However, with the right approach and a comprehensive kit, crafting a truly exceptional **whole fruit blueberry wine** is not only achievable but immensely rewarding. This guide will walk you through the journey, expanding on the insights shared in the video above, ensuring your homemade wine is bursting with flavor and character.Making wine from whole fruit, as showcased in the Craft a Brew video, offers a distinct advantage over using just juice: unparalleled depth and a more pronounced fruit flavor. While it requires a bit more hands-on attention, particularly in the initial stages, the resulting wine boasts a complexity that juice-based wines often can’t match. Imagine a robust blueberry forward wine with subtle nuances – that’s the promise of whole fruit winemaking. Unlike the quicker two-week fermentation for juice wines, whole fruit methods involve an extra step of managing the fruit cap, but the enhanced flavor profile is well worth the additional effort.
Why Whole Fruit Makes a Difference in Homemade Blueberry Wine
When you opt for **whole fruit blueberry wine**, you’re tapping into the full spectrum of the fruit’s potential. The skin, pulp, and even small seeds contribute to the wine’s character in ways juice alone cannot. The video highlights how using whole fruit yields a more complex and “strongly blueberry forward” wine. This isn’t just about intensity; it’s about the broader range of aromatic compounds and tannins extracted during fermentation.
One crucial step for maximizing flavor extraction from your fruit is the freezing and thawing process. Freezing creates tiny, sharp ice crystals within the fruit’s cells. Upon thawing, these crystals puncture the cell walls, effectively breaking them down. This rupturing action allows for a far greater release of sugars, natural flavors, and vibrant color during fermentation. Without this step, much of the fruit’s goodness would remain locked away, resulting in a less flavorful and paler wine. A convenient tip: buying already frozen fruit from the grocery store saves time and ensures the fruit was picked at its peak ripeness. This means you’re getting optimal flavor potential right from the start, often halfway thawed by the time you’re ready to brew.
Essential Ingredients and Equipment for Your Fruit Wine Kit
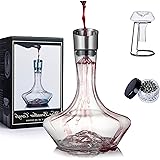
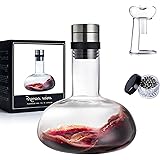
A well-equipped **fruit wine kit**, such as the Craft a Brew offering, simplifies the winemaking process by providing nearly everything you need. The video meticulously details the components, which are crucial for a successful brew. Understanding each item’s role demystifies the process and helps you appreciate the science behind winemaking.
Your kit will typically include:
- **Airlock & Stopper:** These allow CO2 to escape while preventing airborne contaminants from entering your fermenter.
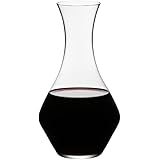
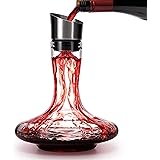
- **1 Gallon Carboy & 2 Gallon Bucket with Lid:** The bucket serves as your primary fermenter, accommodating the fruit and initial fermentation, while the carboy is used for secondary fermentation.
- **Racking Cane & Tip, Transfer Tubing, & Clamp:** This system is vital for cleanly transferring wine between vessels, leaving sediment behind.
- **Straining Bag:** Essential for holding the whole fruit in the primary fermenter, making for easy removal later.
- **Sanitizer Packet:** Absolutely critical for sterilizing all equipment that will contact your wine, preventing unwanted microbial growth.
- **Ingredient Packets:** These are the backbone of your wine’s flavor and stability.
- **Wine Yeast (e.g., Lalvin 71B Saccharomyces cerevisiae):** The workhorse that converts sugars to alcohol and CO2. Different strains, like Lalvin 71B, are specifically chosen for their ability to enhance certain fruit characteristics or perform well in particular conditions, making it ideal for robust red or fruit wines.
- **Wine Tannin:** Adds structure, mouthfeel, and can improve aging potential, much like in traditional grape wines.
- **Acid Blend:** Adjusts the wine’s acidity to create balance and prevent microbial spoilage.
- **Yeast Nutrient:** Provides essential vitamins and minerals for healthy yeast metabolism, ensuring a strong, complete fermentation.
- **Campden Tablets (Potassium Metabisulfite):** Used for sanitizing juice, inhibiting wild yeast and bacteria, and stabilizing the wine at the end to prevent renewed fermentation and oxidation.
- **Potassium Sorbate:** A stabilizer that, when used with Campden tablets, prevents yeast from re-fermenting any added sugars during backsweetening.
- **Pectic Enzyme:** Breaks down pectin in fruit, preventing “pectin haze” and aiding in the extraction of color and flavor.
- **Instruction Booklet:** Your ultimate guide, often featuring multiple recipes like the delicious blueberry wine described in the video.
For this specific **homemade blueberry wine** recipe, you’ll also need about five pounds of frozen blueberries, additional red grape juice, and sugar for chaptalization. The red grape juice complements the blueberries, adding body and a familiar winy character, while the added sugar boosts the alcohol by volume (ABV) to a respectable 11-12%, turning a potentially low-alcohol beverage into a true wine.
The Winemaking Journey: From Fruit to Fermentation
Step 1: Meticulous Sanitization – The Golden Rule
Before any ingredients touch your equipment, absolute sanitization is paramount. The video emphasizes using a sanitizer solution (typically 2.5 level teaspoons per gallon of water) for at least 60 seconds of contact time, up to two minutes. This crucial step eliminates wild yeasts, bacteria, and mold spores that could otherwise spoil your **whole fruit blueberry wine**. Ensure every piece of equipment that will come into contact with your wine, from the bucket to the stirring spoon and even the straining bag, is thoroughly sanitized. Unlike some cleaning agents, many brewing sanitizers are “no-rinse,” meaning you can drain the solution and proceed without introducing tap water contaminants.
Step 2: Mixing the Primary Batch
In your sanitized primary fermenting bucket, combine your red grape juice, along with all the additive packets: tannin, pectic enzyme, yeast nutrient, and the measured sugar for chaptalization. Stir thoroughly until the sugar granules are completely dissolved. The slight splashing during this stage is beneficial, as oxygen is desirable for the yeast in primary fermentation, helping them multiply vigorously.
Step 3: Introducing the Whole Fruit
Next, place your sanitized straining bag into the bucket, wrapping the edges around the rim. Now, it’s time to add your frozen and thawed blueberries. The video suggests “massaging” the fruit, which is a fantastic technique to further break down cell walls and encourage juice release. Gently crush the fruit within the bag before adding it to the bucket. Once all the fruit is in, cinch up the bag with a loose knot and use a sanitized implement, like a spoon, to press the fruit bag down below the liquid line. It’s important to ensure the total liquid volume is above one gallon, as the blueberries will release additional juice (approximately half a gallon from five pounds of fruit), and some sediment will form.
Step 4: Pitching the Yeast and Initial Fermentation
The moment of truth arrives: adding the yeast. The video instructs to pitch an entire five-gram packet of Lalvin 71B wine yeast directly into the mixture. There’s no need to stir; the yeast will rehydrate and begin its work of converting sugars into alcohol and carbon dioxide. After pitching, sanitize your bucket lid, attach the stopper, and assemble your airlock, filling it with water to the indicated line. The airlock serves as a one-way valve, allowing fermentation gases to escape while preventing unwanted oxygen and contaminants like fruit flies from entering. This crucial device is what protects your nascent **homemade blueberry wine** from spoilage.
Step 5: Managing the Fruit Cap (Punching Down)
For the first week of primary fermentation, you’ll need to “punch down” the fruit cap daily. Carbon dioxide produced by the fermenting yeast will cause the fruit bag to rise to the surface, forming a dense cap. If this cap remains dry, it becomes a breeding ground for mold and bacteria. Therefore, every 24 hours, use a sanitized spoon or potato masher to gently push the fruit bag back down below the liquid surface, ensuring all the fruit remains submerged and wet. This process, as demonstrated in the video, is repeated for approximately the first seven days. After this initial period, you can seal the bucket and allow the remaining primary fermentation to complete in a dark, cool place for another week.
Secondary Fermentation and Beyond: Refining Your Blueberry Wine
After about 14 days in primary fermentation, your **whole fruit blueberry wine** is ready for its next stage. At this point, the yeast has done the bulk of its work, and it’s time to separate the wine from the fruit and significant sediment.
Step 6: Removing the Fruit Bag
Don clean gloves for this step. Carefully pull the cinched fruit bag from the bucket. The video demonstrates the critical importance of squeezing every last drop of juice from the bag. This ensures you extract maximum flavor and yield from your blueberries. Discard the spent fruit solids.
Step 7: Racking to Secondary (Carboy)
Thoroughly sanitize your 1-gallon glass carboy and your racking system (cane, tubing, clamp). The goal is to transfer the wine from the primary bucket to the secondary carboy, leaving behind the heavy sediment (lees) that has settled at the bottom of the bucket. A clever trick mentioned in the video for starting your siphon cleanly is to fill the transfer tubing with boiled, cooled, or bottled water, then connect it to the racking cane and allow the water to drain into a waste bucket. As the water flows out, it creates a siphon, pulling your wine behind it. Once the wine starts flowing, clamp the tubing and quickly transfer it to your carboy.
Minimize headspace in the carboy. If your wine doesn’t completely fill the carboy to the neck, as was the case in the video, top it up with some of the reserved red grape juice. Too much headspace can lead to oxidation, which can flatten flavors and introduce off-notes. Seal the carboy with a stopper and airlock, then place it in a dark, cool spot for several weeks to allow secondary fermentation to complete and the wine to clarify.
Step 8: Cold Crashing for Clarity
Once fermentation is complete, placing your carboy in a refrigerator for a few days to “cold crash” is an excellent technique for clarification. The cold temperatures cause remaining yeast cells and fine particles to fall out of suspension, settling at the bottom. This leaves you with a much clearer wine, even if it’s as dark as the blueberry wine in the example.
Step 9: Stabilization and Backsweetening
Before bottling, your **homemade blueberry wine** needs to be stabilized, especially if you plan to sweeten it. Stabilization involves adding Campden tablets (potassium metabisulfite) and potassium sorbate. These two agents work in tandem to prevent any dormant yeast from reactivating and re-fermenting once sugar is added, which would lead to fizzy bottles or, worse, exploding ones. Transfer your wine to a sanitized bottling bucket for this step.
If you desire a sweeter wine, this is the time for backsweetening. The video suggests slowly stirring in sugar (or real vanilla extract for an optional flavor layer) while gently agitating the wine. The key is to stir slowly and avoid splashing, which can introduce unwanted oxygen. Continue stirring until all sugar granules are dissolved. Allow the wine to sit for 24 hours after stabilization and backsweetening to ensure the stabilizers have fully integrated.
Step 10: Bottling Your Blueberry Wine
With your wine stabilized and sweetened to taste, it’s time for bottling. Ensure your bottles are meticulously clean and sanitized. Using your racking system with a hose clamp at the end allows for precise control of the wine flow into each bottle. Fill the bottles to just below the cork line, shut off the flow, and move to the next. Finally, seal your bottles with corks. This process completes your journey from whole fruit to bottled **whole fruit blueberry wine**.
The resulting wine, as described in the video, offers a delightful semi-sweet profile with a strong blueberry presence, complemented by the “winey” notes of grape juice and a pleasing tannic bite. It’s an “excellent early drinking wine,” showcasing the successful conversion of simple fruit into a complex, satisfying beverage. Happy winemaking!
Uncorking Your Wine Queries
What is whole fruit winemaking?
Whole fruit winemaking uses the entire fruit, including the skin and pulp, rather than just juice. This method results in a wine with deeper, more complex flavors and a stronger fruit presence.
Why is it recommended to freeze and thaw the fruit before making wine?
Freezing and thawing the fruit helps break down its cell walls, which allows for a much greater release of sugars, natural flavors, and vibrant color during fermentation. This makes your wine more flavorful and colorful.
What is the most important step before starting to make homemade wine?
The absolute most important step is meticulous sanitization of all equipment. This prevents wild yeasts, bacteria, and mold from contaminating and spoiling your wine.
What does it mean to ‘punch down’ the fruit cap during fermentation?
Punching down means gently pushing the fruit bag, which floats to the surface during fermentation, back down into the liquid. This prevents mold and bacteria from growing on the dry fruit and ensures continuous flavor extraction.